Paintings in frame
Post from EditorialsA touch of inspiration transforms the wall of the living room, decorative object, which dominates the scene with the square inscribed in a great frame that acts as a mat.
Customize a wall
Here is an example of how you can invent, with little expense and a little fantasy, an original wall.
In fact, staying out of the traditional mold, it takes little to change the face, the plastic effect, the movement.
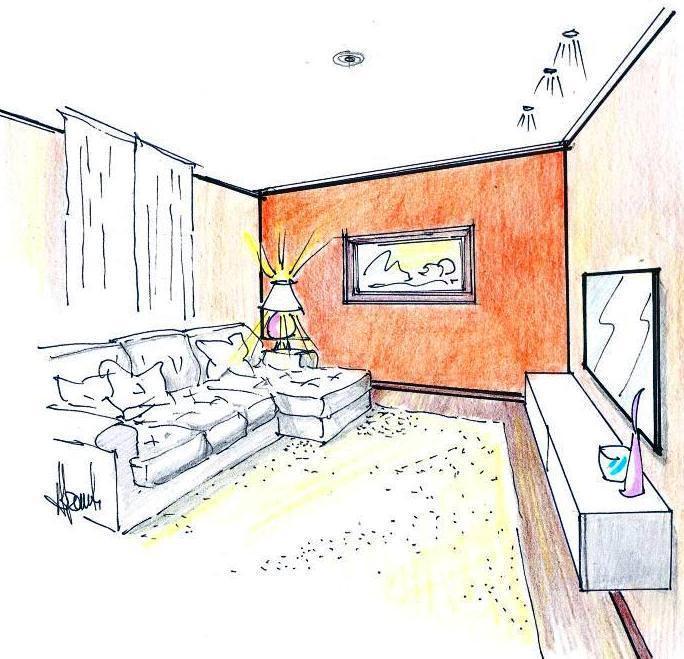
One would naturally think to include something like shelves, box - maybe hanging multicolor, or crystal, to avoid burdening the visual effect ... or look for another solution. From my hand drawing, you can see a situation where, a few days ago has been completed the painting of the house.
They then got the furniture in the living room, consisting of a sofa with peninsula, a storage wall, a rug and a cube coffee table.
On the supporting plane we have placed a lamp with double light, ie upwards to the diffused light, and downward for reading, or watching TV.
Now you should choose a lamp from the ceiling, and the furniture would be completed. It is clear that the back wall, resulting in a stronger color than the other side, it was desired to give movement to the living room, and create a visual game, with the front of the kitchen behind us.
Everything was well coordinated, but the front wall, with only the central framework, was not satisfactory. Therefore, here's an idea that I propose to infuse personality to this anonymous wall, with DIY.
DIY Wall
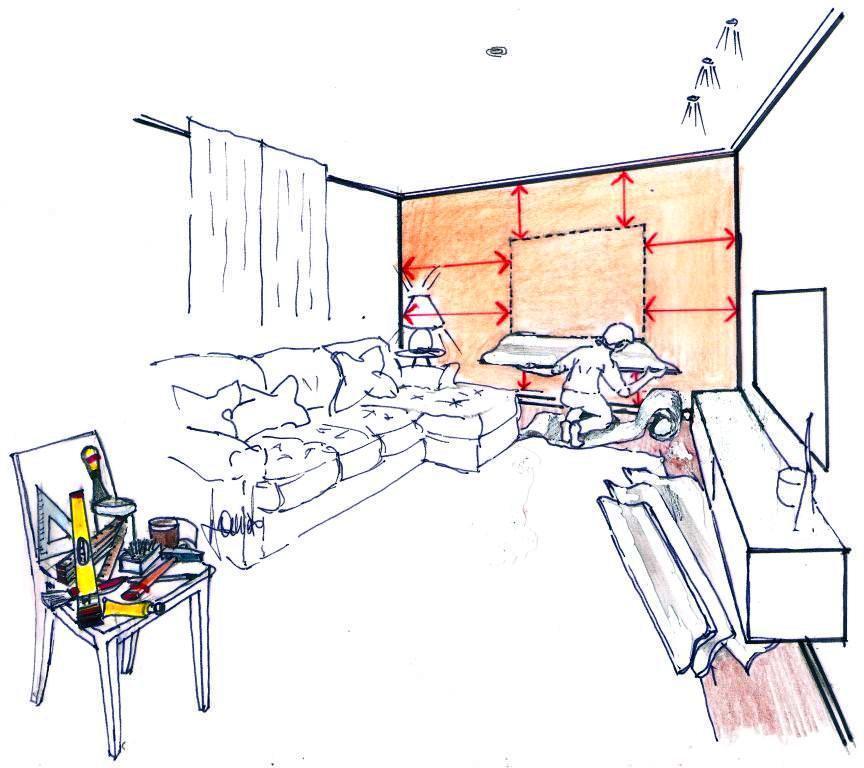
So let us see in my drawing below, what are the materials and tools that are needed, along with a dose of unfailing good will, to accomplish everything.
Four linear frames in polyurethane foam, available from supermarkets.
These profiles must have a molding of a thickness of 5-8 cm, a width of 10-20 cm, and a length of 150 - 200 cm minimum.
A sheet of bubble wrap for packaging, at least 2 meters, to be used to protect the floor during work, a roll of paper tape from bodybuilder to 3 cm wide.
A bubble level, a wooden meter stick or tape to a 45° angle and a pencil.
400 fine-grained sandpaper, a jar of white stucco wall ready for use, and a cutter.
A metal spatula to average width, a paintbrush, and a tube of water-based adhesive glue, to immediate grip.
A hammer and a box of nails average about 2.5 cm, complete with hooks for pictures.
A jar of acrylic paint label, in this case white satin.
A swiveling LED spotlight, to be mounted to the ceiling light point already prepared, to focus the light on the wall.
Thus, as shown, you can already draw with pencil and meter, then the outline of the picture that we're going to settle on the wall, taking care to use the bubble level.
It is necessary to measure the dimensions sidewall spacers, so that a contour is obtained from the edges of the frames, to the wall, as indicated by double pointed red arrows.
Mounting frames for wall
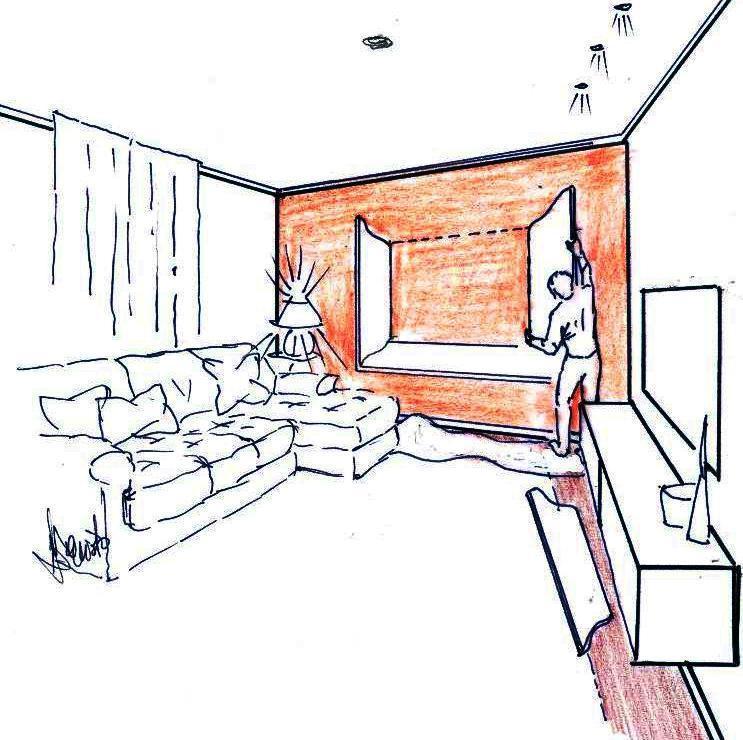
 From the representation on the side, you can see the bonding phase of the frames.
It is first provided to evenly apply the glue to hold fast, all around the perimeter of the square drawn.
So, bearing bracket and cutter, cut 45° ends of the frames, the desired extent.
The bracket will also help to fix one by one the frames on the wall, and so that they form between them, 4 precise angles. It will also be appropriate to hang with care, a little glue at the junction of the 45° diagonals, the framework we are going to get. Once glued together the 4 frames on the wall, let the glue dry for a few minutes, so that the socket total.
Then we apply the masking tape on the wall, around the inner and outer edges of the frames, to avoid soiling the wall with the subsequent operations that we're going to do.
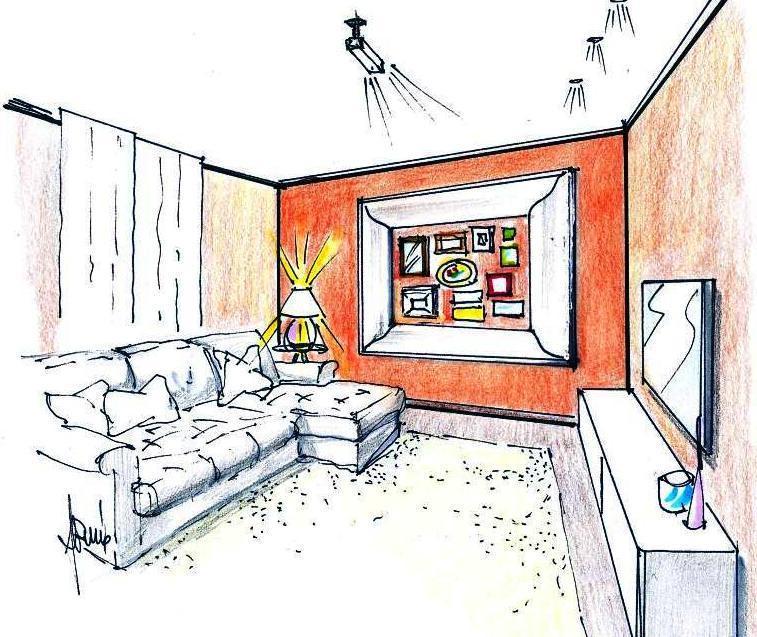
Wall with paintings in a frame
At this point, we proceed with spatula and putty, to make a few small tweaks of the frames. Let dry for about 20 minutes, and then in a glass can dilute a small part of stucco, with the addition of two parts of water.
And with the brush, we pass the diluted putty, first on the parts already grouted previously, and then the entire surface of the frames, thereby obtaining, the base primer for the subsequent painting.
Once all of the background is fully dried, you need to use sandpaper to make the surface smooth and uniform, taking great care in the joints.
Then proceed with a first coat of paint, after which, for an optimum yield, we finish with a second pass of paint.
After completing the drying of the paint, you can carefully remove the protective tape applied previously.
And finally we have the personal satisfaction of having, within the large frame thus obtained, checks, photos, collections of miniatures, to put them on display.
The scene is completed by the illumination provided by the LED adjustable spotlight placed on the ceiling, we fully enhances the final result, which is a wall with an elegant tone, although produced in DIY, and at an extremely low cost.
80321 REGISTERED USERS


