Laying the wallpaper
Post from EditorialsThe laying of the wallpaper can be done independently, taking care to avoid some small errors that can compromise the success.
How to lay the wallpaper
The laying of the wallpaper is not difficult: you must, however, have a good precision and work with some care. Io the market there are a large number of versions of wallpapers: light or dark colors, geometric designs or fancy, various thicknesses and very diverse paper consistency.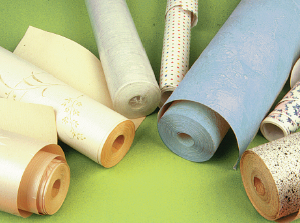 The plain color wallpapers undoubtedly create fewer problems, while those with repetitive designs (especially geometric) require to be laid in precise combinations otherwise you immediately notice the seams of the sheets.
When choosing the wallpaper also keep in mind that if the environment in which this will be applied, there are many pictures, the wallpaper should be light colored and with an unimportant pattern. The wallpapers of light colors are well suited to small spaces while wallpapers with darker shades can modify substantially the perspective of broad environment.
Take also into account the fact of not covering the entire height of the wall but only up to a certain level. This system allows to give greater visual height to a low environment.
The preparation of the walls
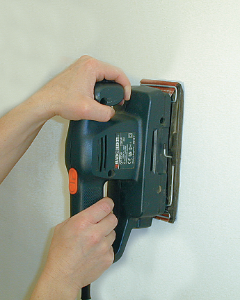 The wall must be carefully smoothed to free it from any rough edges. It can also be useful, before applying the new wallpaper to treat the walls with a fixative which serves to strengthen the surface, seal the small holes and avoid the glue used to soak the wall.
Prepare the adhesive
One should always use the adhesive suitable for the type of wallpaper and carefully follow the manufacturer's instructions in preparation. For all the standrd wallpaper use an adhesive based on cellulose which is available in different types, normal and high sealing, which are to be used depending on the weight (greater or lesser) of the paper and its ability to soak up.
The wallpaper cut
At this point you have to cut the sheets from the roll and find the place to start laying the first sheet. Measure the height of the wall to be coated with a metal tape measure: taking account of this measure, add 3-8 cm in the top and bottom to prevent deficiencies and cut, using a cutter and a metal ruler.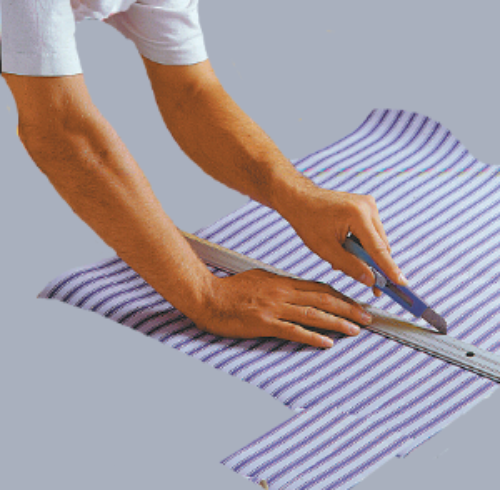
Roll out the first sheet, with the visible side up, on the table and unroll beside the scroll you will cut the second sheet from. Move the sheet matching the decorative motifs (if any), then cut the second sheet and continue in subsequent cutting sheets always using as a reference, the length of one panel.
Glue application
Place the sheet with the top on the table. Spread the glue with a wide brush, making sure it is perfectly blended, smooth and lump-free. Distribute it evenly, especially on the long edges.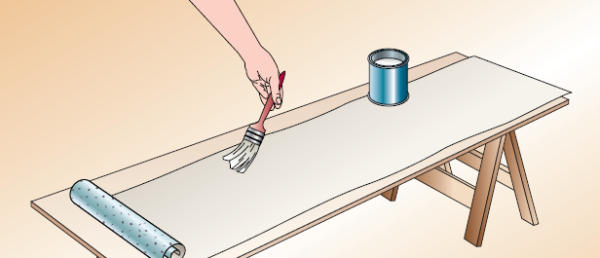
If the sheet is markedly longer than the workbench fold a part of the sheet with the glue side against the other glue side and apply the glue on the surface which was still free: this is a simple gesture but it must be learned with some proof. Let the paper soak for a few minutes.
The laying of wallpaper on the wall
The application on the wall is not difficult: the only rule is that the sheets are placed perfectly vertical. To accomplish this trace, using a plumb line, a perpendicular line that will allow you to apply the one sheet perfectly positioned. Along this line apply the edge of the first sheet.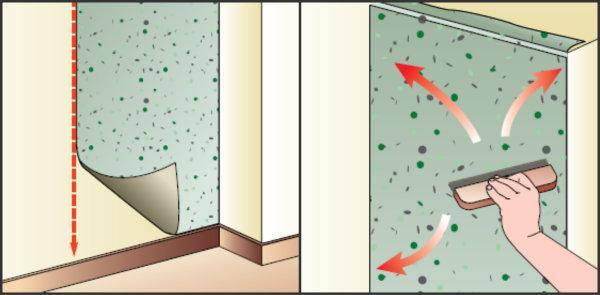
The first few times it is advisable to have someone supporting the sheet while you apply it precisely to avoid the classic accidents that happen to beginners.
The use of the brush
Treat, with the next steps, the sheet just laid on the wall with the upholsterer brush, using the back to make a turn between the dry wall and ceiling and to make it stick on the corners. Working with brush, go from top to bottom until they reach the lower end of the wall. Here, too, do a turn, as above.
Eliminate the trimming
To cut off the excess (ie trimming you have left at the beginning) past the back of the cutter or scissors into the crease between the ceiling and the wall (or floor and the wall). The second sheet is applied as the first, but you should refer to the correct vertical alignment, the outer edge of the first sheet, being careful to match precisely the possible motive of the design. The paper goes just a little overlapping the edge of the first sheet.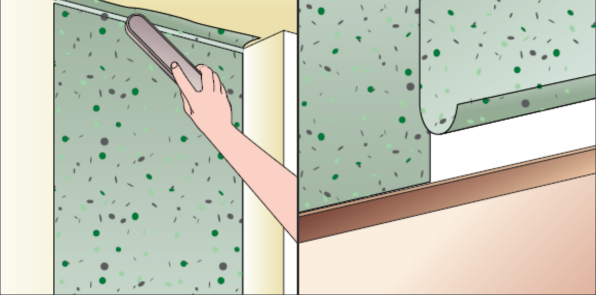
Then, placing both hands on the sheet, make short movements needed to match perfectly any decorative motifs. Attach the cloth working brush to press well the paper against the wall.
The pre-glued paper
This type of wallpaper is very practical, since it is already equipped with a special adhesive in the part that is in contact with the wall, which is activated when it comes in contact with the water.
Cut the sheets to match any decorative motifs. Then roll them up (not tightly) creating the rolls that have the visible part inside.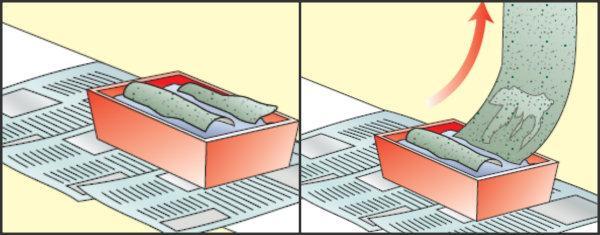
Dip the rolls in a pan filled with warm water and let them get to the time indicated on the packaging of the rolls. Grab the first wet sheet for the two top corners, and lift it up to the ceiling, presenting and applying it to the wall with a sponge to remove excess water and air bubbles.
Apply pressure carefully going through the sponge and dry with a roller on the edges, then cut the excess. Then proceed as normal with the wallpaper being careful not to damage the paper, which is impregnated with water for which may tear.
The editorial recommends:
Where to begin with the application of the wallpaper?
As a rule, in the traditional system, it is laying the first strip of wallpaper in correspondence of the window, or a projection, such as a fireplace. If there are two windows on the same wall, you should pull two strips symmetrical to the center between the two fixtures. For the fireplace, placing the strip centered on the mantelpiece. It then proceeds in both directions, moving away from the areas illuminated in such a way that the joints do not stand out.
If the walls of the premises are not angled, you have to use a plumb line, tracing the vertical guide on which to align the first sheet.
Measure the height of the room in the position where it poses the first strip, and add 4 cm per trimmings to the ceiling and the skirting. It is then cut all the other strips to the same extent, combining the first strip previously cut on the roll so as to match the designs of the saved over the entire wall. No need to pull the strips for plain color wallpaper, or with design that does not require matching.
Laying of wallpaper in hard spots
Laying the corners:
internal corners: measured starting from the last towel posed, add 2 cm so that the sheet is aligned along the vertical line overlapping the fabric adjacent;
outer corners: a recess is papered overflowing of 4 cm on the perimeter and then applying the sheets on the corner;
posing behind the radiators when the radiators can not be moved, you glide the paper behind the radiator after scoring on the same vertical line that starts from the position of the support brackets at the bottom of the sheet;
laying around outlets and switches: after switching off power and removed the plate, applies the sheet that insists on the vertical switch, pressing firmly on the paper so as to leave an imprint. There is a hole, and connect the electric wires to the terminals of the plaque that will be screwed in place to the wall;
laying around doors and windows, for the sides of a recess using the same method for the angles protruding, ie it is covered first one side and then the other.
For papering the inner part of the recess, cut sheets longer than 4 cm applying them to the bottom wall starting from a corner, on which will straddle mounted a couple of centimeters of cloth so as to link up to the wallpaper of the wall of the recess itself. Finally, cover the vertical wall that is located above the recess.
80356 REGISTERED USERS


